Sunday, December 5, 2010

The Perfect Nude Lip


I will admit it, this post is a fashion repeat! However, I will be focusing on a different aspect of the look: those luscious lips! For the eye tutorial check out "Prom/ Girl's Night Out".
October was Italian Heritage Month at my university and we closed with a formal dinner. I was embarrassingly overdressed however, I still had a great time. There was great food, good music, and beautiful people!

My room mate Katie and I.


The first step to the perfect nude lip is exfoliation. I like to get a handful of sugar, mix it with a little bit of water, and then rub it vigorously on my lips for a few seconds. Another tip is to brush your lips with your wet toothbrush. Both options work great!

Next, take a little bit of concealer and spread it all over your lips. This helps neutralize the color in your lips in order for them to look more nude.

Recently I was turned on to lip liner. It really is as amazing as they say it is! Unfortunately mine is MIA so I can't tell you what brand or color I used. First line the lips in the pencil (I would recommend staying inside your natural lip line because drawing outside of it will look very costume-like) and then, fill in the entire lip-just like a coloring book.

Then, using a lip brush I went over the lip liner with Not So Innocent Pink by jane. When choosing a nude color, get something with a hint of pink. I've found that anything too brown makes my teeth look yellow.

Optional step: swipe a thin layer of pink or clear gloss for extra plumpness! I used Lip Inflation in Sheer Pink by Sally Hansen.


Love an poofy lips!

Anna

Wednesday, November 17, 2010

Day of Natural Beauty


Last month I happened upon a Facebook event called Day of True Beauty. The mission of this day was " a worldwide celebration of true, natural, and inner beauty..." At the time I clicked "attend", I didn't realize what an impact this would have on me. No concealer, eyeliner, mascara, lip tint, NOTHING. While reading this, I'm sure most of you are thinking "big deal, I go without makeup all the time" or " she doesn't need makeup anyways." I assure you, this was one of the most difficult things for me to do. When I do something, I do it right; so this meant no foundation, concealer, eyeliner, mascara, eyeshadow, blush, lip stick, gloss, or nail polish.


When I woke up this morning I was excited because I really hoped to get a lot out of this day. However, as the day wore on I became less and less enthused. I realized that the view I have of myself is completely warped and for so long I have been hiding behind a mask of chemicals. Getting ready went a lot quicker since I only had to dressed! As I started walking around campus I became a increasingly paranoid because I noticed that I was getting a lot of glances. I couldn't help but think, "Oh my gosh he thinks I'm ugly because I'm not wearing any makeup" or "Ahh! She is staring at the discoloration in my skin." I was trying to reason with myself but the bad thoughts were in control.
After the day was about half-way finished I happened to pass by a mirror and I literally startled myself because I didn't recognize the face looking back. I was saddened when I realized that I no longer saw myself as I was, but for whom I pretended to be. The persona of "perfection" had become me and the real me had become the persona. I tried to think back and figure out when, why, and how this happened but I couldn't.


Upon further reflection a series of thoughts came to mind. As previously stated, I wondered why I didn't feel comfortable without makeup and when and how this came about. Most importantly, I conquered one of my greatest fears. In addition, I thought about what changes I would make for the future. While I will not be giving up makeup entirely, I think I will definitely be wearing less as well as have my own days of natural beauty more frequently. I will also be smiling more. It instantly makes you more beautiful because it is a physical manifestation of your inner beauty. With that, I encourage those of you who can't go without makeup to try au naturale for a day; and to those who already let their natural beauty shine, maybe try to go one day enhancing that beauty with a little makeup!
Have a lovely day you natural beauties!

Anna

Sunday, October 24, 2010

Little Red Riding Hood


This look was requested by my very dear friend. I think there are a lot of routes you can go regarding Little Red. I thought I'd break away from the typical "sexy" costumes that seem to be all too popular this time of year. I inspired by an old storybook watercolor of this fairytale. Something vibrant, yet subtle with soft, blended lines.


The first and very crucial step is prepping the face. Since this is a costume look you're going to be applying much more makeup than you normally would.

I began by exfoliating my face. You can use something from the store such as St. Ives, or a home made concoction of sugar, salt, or cornmeal. Make sure that you get your lips too!

Next, I applied a facial moisturizer. I like to use Oil-free moisture for sensitive skin by Neutrogena.


Really freaky looking, I know. I promise it gets better.


In order for your foundation to look even and last all night, apply a thin layer of primer all over the face. I used Smashbox's Photo finish bronzing foundation primer. I have very porcelain skin so I like that it gives me a hint of color. If you have redness, dark spots, or sallow skin the primer also comes in green, apricot, and purple to neutralize any discoloration.

Then comes the foundation. I used L'Oreal's Infallible make-up in Classic Ivory and applied it using a makeup sponge. Fingers and brushes also work! I cannot stress the "F's" enough... Foundation First before concealer! After the foundation, apply concealer under the eye and on the lid, on the chin and lips, in the creases of the nose, and anywhere else you might have redness or uneven color.

Finally, powder your face with a light or translucent powder to set everything into place.

Now for the fun part! As I said earlier I was inspired by watercolor paintings so for the eyes we will be making a color wash. First, dip your brush in a little bit of water and then into your first color. I used a shade of medium blue and applied it all over the lid. Then, I smudged it up to the crease using my finger. Then, using the same brush, I applied a white wash to my brow bone and took a lighter blue and applied it from the inner corner to the center of the eye. Blend blend blend! Finally, using a fluffy brush I contoured the eye by making a c-shape with a navy color. For an application refresher course click here.


Next, I took my trusty grey Ulta eyeliner in Charcoal and applied it to both the top and bottom. Then smudge smudge smudge! With this look there shouldn't be any distinctive lines.

I didn't have any false eyelashes on me, however, I would highly recommend using some since it is Halloween after all! Who wouldn't want a little more glamour? If you don't know how to apply falsies watch this amazing video by makeup guru, Kandee Johnson.

For the cheeks, I just took a little blush and applied it only to the apples of the cheeks. I think this gives it more of a doll feel.

Then for the best part, the lips! I used E.L.F's Mineral Lipstick in Cheerful Cherry. I think an even brighter red would have been better, but this was all I had.

Now for the unveiling of the finished product!................................................................


I hope you all like this look. Let me know what you think! If you decide to recreate this look you can post the pictures on my facebook page. I'd love to see it.

If anyone else has a look that they'd like me to do let me know soon so I have enough time to complete it for you before Sunday.

Love, Anna

Friday, October 22, 2010

Costume Ideas


Hey guys!

As I'm sure you're aware, Halloween is next weekend and I am really desperate for costume ideas! I honestly have NO idea what to be. Please comment below or on my facebook page with your ideas.

Love, Anna


Wednesday, October 6, 2010

Halloween


Hello ladies!

One of my favourite holidays is rapidly approaching...Halloween! I hate being scared but I love dressing up!

Some of my previous costumes: A die (one dice), Poison Ivy (from Batman), Snow White, a pumpkin, Esmeralda, and Belle. I'll have to ask my mom to send me some pictures so I can show you all!

Anyways, I just wanted to know if any of you had any requests for makeup tutorials.
Also, see if you can guess what I am going to be!

Feel free to comment below, or on my facebook page.


Tuesday, October 5, 2010

My Favorite Things: e.l.f Makeup

About three years ago I made a discovery. While I was in the pharmacy I saw a rack of makeup with items costing only one dollar. That is right, ONE DOLLAR.


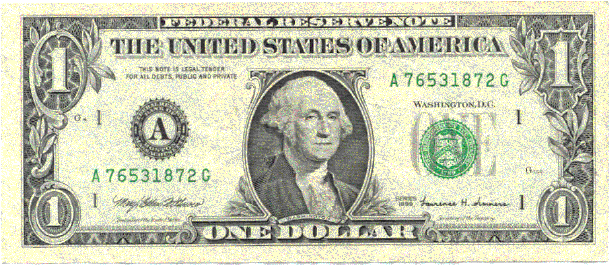
dolla dolla bill ya'll


I thought to myself, "this has to be too good to be true, or some kind of sick joke". But oh no, I was completely wrong. This was the start of a beautiful romance between e.l.f and me. One of the things I really like is that they have three product lines so you can shop according to your budget.

First there is the e.l.f. Mineral Makeup with prices starting at $5 for both makeup and brushes. The pigments are beautiful and very long lasting. I especially like the lipsticks.


Next, there is the Studio Makeup with prices starting at only $3! Last week I bought the most amazing color palette. For $15 I purchased 100 eyeshadow colors, which comes down to $0.15 per eyeshadow!

Finally, there is the Essential Makeup like for all you girls on a tight budget with products starting at $1!

The best part about e.l.f. is that there are always send me coupons. Free shipping, buy one get one free, 50% off my purchase, free eyeshadow with the purchase of a brush... yay for deals!

I bought ALL of this for only about $25! 100 eyeshadows, mineral mascara, mineral lipstick in Nicely Nude, and lip and eyeliner brushes. Seriously, such a deal. I really cannot stress how much I love this company.

Have a lovely day and shop smartly!

Anna

Saturday, October 2, 2010

New Hair!

Any of you who know me, know that I love to change my hair. I've had pink streaks, half brown half fire engine red, light brown, dark brown, ginger. You name it, I've had it (except for blonde)! Another part of my personality is that I am often spontaneous! Last week I had an itch to change my look so I grabbed the scissors and went to work! You really can learn anything from Youtube, as well as from your friends (Thanks Maggie!). This look is the sum of my craziness, spontaneity, and inspiration from one of my fashion idols, Zooey Deschanel.


Ok, so you all know what I looked like before. If not, just look back at my other posts!

Here is the after...

Please tell me what you think!

Have a lovely day,
Anna

Friday, September 24, 2010

An Afternoon in Bryant Park


As I said in my previous post, my dear friend Jasmin came into town for a quick visit. The day she left we found out there was a free opera concert in Bryant Park, an opportunity we could not say no to! I felt so cultured eating my Italian-inspired food whilst listening to the beautiful arias.


A quick snapshot of the park I took while waiting for Jasmin and John to return.


We had SUCH a nice time together eating our amazing sandwiches from a little cafe and of course Red Velvet cupcakes from Magnolia Bakery! Writing this post is making me so hungry!


Prosciutto e mozzarella with pesto...simply amazing


Perfection in a pint-sized cake!


Ok, on to the purpose of this post. To give you another look!


I wish that I had some more pictures of Jasmin because her makeup was flawless. I absolutely loved her look.


This makeup look was actually very simple to create. It's a variation on my Fast Face #1. Same eyes, different lips!

For the eyes, I used the Good Girl palette by Ulta.

All I did was use one of my favorite brand, e.l.f.'s Super Glossy Lip Shine SPF 15 in Pink Kiss.

Simple as that!

Questions, comments, ideas. Please post! I think I'm finally getting back into this whole blog thing and I'm in need of some ideas!

Have a lovely day!

-Anna

Thursday, September 16, 2010

Singin' in the Rain

This week my dear friend Jasmin came into town for a visit! We had planned to spend the day walking around Manhattan until I looked out the window...RAIN! We didn't let the somber forecast ruin our day! Here is a quick look I threw together that was weather-proof but still metropolitan- girl approved!


The key to rainy day makeup is to keep things natural. The last thing you want is your eyeliner and mascara streaming down your cheeks!


For the eyes I did a basic neutral which can be found here!

I decided to play up my cheeks a little more since I was keeping everything else simple. I used New Clover by Clinique. It's a blue-based pink with a hint of shimmer!

The lips I also kept simple. I applied a thin layer of foundation to neutralize the color of my lips and then swept a layer of Covergirl Outlast All-Day Lipcolor in Nude.

Have a lovely day, rain or shine!

Friday, August 27, 2010

Zebra Nails


I usually tend to be very traditional when doing my nails. I stick with pinks, reds, browns, and the occasional French manicure. However, as soon as I saw this funky nail art it was love at first sight! The best part about it is that it's quick and easy!

I began by prepping my nails. I quickly filed them and cut away the excess cuticle. Then I applied a thin layer of Chip Skip by OPI. Let me tell you, this stuff is AMAZING and worth the investment. I can wear my manicures for at least two weeks without any chipping or peeling. Next, I put on a base coat. I used Double Duty by Sally Hansen for the first time and it's holding up so far! For the base I painted on two coats of Alpine Snow by OPI. Typically, I only use OPI because it has incredible coverage. In my opinion, it's worth the $8.00.

After that dried completely, I took a Sally Hansen Nail Art Pen in Black and made abstract lines starting at the edge of each nail. The best part is that you can't mess up (though in my opinion a couple of my nails look like black chromasomes on a white background)! To finish it off, apply a thin layer of the top coat of your choice.
And there you have it! A really quick, easy, edgy way to accessorize your outfits!

Tuesday, August 10, 2010

Best Friends

Ok, it's time to get down with the nitty gritty-the thing that no woman wants to discuss, acknowledge, or admit to- bras. We all wear one and it's nothing to be ashamed of, except if you're wearing an ill-fitting one. Bra's should be comfortable. They should make you feel like the beautiful woman that you are! So throw out the old, stretched-out training bra from junior high and invest in something classy. I assure you that finding the right one isn't as hard as you think!


Step 1: Get Measured

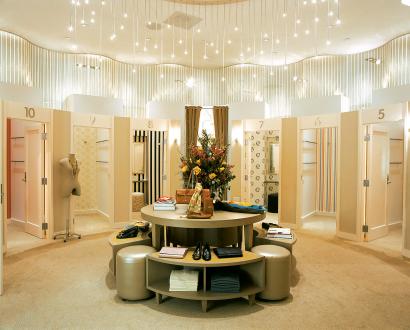
Don't be embarrassed! Just walk into a department store like Nordstrom's or Macy's or even Victoria's Secret and they will do it right then and there for free! You don't even have to take any of your clothes off to get fitted properly. Really, there is no need to be shy. The women are so nice and only want to help you feel your best! Do yourself a favor and get properly sized.
Step 2: Choose A Few Styles

Underwire, padded, demi, balconette, minimiser... not every bra will be the right style for your body type. This is why you should try several different ones. There are so many adorable bras out there in a plethora of colors. It doesn't matter how large or small you are, I guarantee you can find something fashionable and supportive that make you happy and feel amazing!


Step 3: Try it on

Do not, I repeat, DO NOT leave the store without trying said bra on. Just because you are a 34 B in one brand doesn't mean you will be that size in another brand. Don't ever spend money on something that doesn't fit right then and there.

Fitting tips: 1. Straps should be snug and not fall off or cut into shoulders.
2. Breasts should neither bulge out of the top or sides, nor should the cup be puckering.
3. Back should remain snug well under the shoulder blades.


PLEASE check out this list of common bra problems and their solutions. These are the greatest and most in depth diagnoses I've ever seen! I highly recommend it!

Tip: Always buy a bra with SOME padding in order to avoid an extremely embarrassing moment.

Have a lovely day!

- Anna

Saturday, July 17, 2010

My Favorite Things: Jack Black Intense Therapy Lip Balm


Most girls have a shoe or bag obsession, I have a makeup obsession. The first step to recovery is admitting you have a problem, right? During one of my recent sephora.com binges I happened upon the most amazing lip balm I have ever found.
I have very dry skin as it is and the Chicago weather can be extremely harsh on my poor lips! Never fear Jack Black Intense Therapy Lip Balm is here to save you!

It's made with Shea butter, Avocado Oil, Sweet Almond Oil, Lemon Peel, Chamomile, Green Tea, and Vitamin E. It also has SPF 25 to protect your lips from those damaging UVA and UVB rays. Most importantly it smells absolutely incredible.
I've found that most lip balms such as ChapStick and Burt's Bees only temporarily condition until the product is absorbed. When I use Jack's my lips continue to feel soft long after it wears off. It's a little bit pricey ($7), but in my opinion is a quality product that is worth every dollar!
Jack Black's comes in 3 flavours: Natural Mint, Lemon and Chamomile, and Vanilla and Lavender and is available here.

Friday, July 2, 2010

We Have a Winner!


Firstly,thank you to all who voted! It was a close call, but the winning look with a WHOPPING eight votes was.........the Smokey Eye!
Secondly, I profusely apologize for not keeping up with the postings, I'm really sorry. I could give excuses or I could just make up for it by giving you some rapid fire looks to make up for it!

I know I say this practically every time but, I really love the smoky eye look. It really draws attention to your face, and most importantly to those little windows into your soul! The smoky eye is a staple look that every fashion conscious girl should know how to do. One of the best things about this look is that it is so versatile. You can go more classic and use colors like black and brown, or you can make it modern by using colors such as purple or green as seen below.


Rules: 1. Thou shalt not wear a smoky eye with thin eye brows. Because it is so bold it must it must be anchored with a strong brow.
2. Thou shalt tone down all other features. The lips and cheeks must not compete for the attention.
3. Thou shalt feel like a powerful, ultra-feminine, beautiful woman when wearing the smoky eye.
4. Thou shalt apply several thick coats of mascara for the same reason as #1.
Tips: 1. Liberally apply a layer of powder under the eyes before you start to catch any shadow
that may fall. When you are finished simply sweep the powder off your face to avoid any under eye smudging.
2. Blend, blend, blend! Smudge, smudge, smudge!
3. Use many shades of which ever color you decide to do in order to make it as vibrant as possible.
4. Try to make a gradient of color starting with the very deepest shades at the outer corners and the lightest towards the inner corners.

All that being said, let's get get started!


The application technique for the eye shadow is the same as it's always been!

Eyes: Brow bone: Lightest brown from the Good Girl palette by Ulta.
Lid: Second lightest brown from the Good Girl palette by Ulta.
Crease: YDK, Smog, by Urban Decay
Outer Corner: Darkest brown from the Good Girl palette by Ulta, Twice Baked by Urban Decay
Inner Corner: Iceland by Ulta

Cheeks: Joy by E.L.F.
Lips: Everbloom Kiss Outlast Lipstain by Cover Girl
Eyeliner: Espresso by Ulta. With the smoky eye I tend to go a little bit heavier on the eyeliner. Tip: With the smoky eye I tend to go a little bit heavier on the eyeliner.To ensure long-lasting, smudge-proof eyeliner I take a small angled brush and lightly press a dark chocolate brown eyeshadow onto the lash line in order to set the eyeliner.

Friday, June 18, 2010

Barbie


Happy Weekend! I thought I'd spice things up a bit with this really fun look I created. So, Thursday night I went to a party for Toy Story 3 and after some serious brain storming I decided to go as.....


.....TOUR GUIDE BARBIE! Let me tell you, I had so much fun putting this together! I think it turned out rather well for such little planning.


Okie dokie! As always let's start with the eyes! I grabbed every single shade of purple I could find. For application directions check out my previous post.

Lid: Grifter by Urban Decay

Crease: Bayou, Rockstar, Passionberry by Ulta, Last Call, Flash by Urban Decay Purple from the Flamboyant eye shadow duo by HIP

Brow bone: Iceland by Ulta

Highlight: the Light Pink from the Girly Girl palette by Ulta

Lips: mega last lip color by Wet n' Wild in Think Pink. Let me tell you I was skeptical buying it because it only cost $2.99 but I love it! It's a fantastic, vibrant shade of pink that lasted the entire night without having to reapply.

For this look I also used fake eyelashes by Modlash!

Buh bye! Buh bye now!


Tuesday, June 15, 2010

Back to Basics: Blemish Eraser


Because I love you all so much I have decided to humble myself and show you the real me....


Yes, I get pimples. Really big, ugly ones. This huge spot has been plaguing my face for about two weeks now and I can't seem to get rid of it! If you are blessed with perfect skin then check out some of my other posts. If not, then read on for four easy steps to hiding those blemishes!

Step 1: Apply a light coat of foundation.

TIP: Touch the spot as little as possible. Make sure to use a sponge or brush for application. If you touch the pimple it will become greasy and the products will not last.


Step 2: Put a thin layer of a green concealer to neutralize the redness. Nyx, Neutrogena, Physician's Formula, Maybelline, etc. all make this type of product.

Step 3: Put a flesh colored concealer that exactly matches your skin tone over the green.


Step 4: Powder
There you have it! Virtually invisible! Now put your best face forward and don't be embarrassed by any pimples you may have. If you have confidence and smile people won't even notice those little spots on your face.

Have a lovely day!

Anna

Saturday, June 12, 2010

Fast Face #3


Again, I was running late for work but as a saleswoman and secretary I have to look my best! I came up with this little number after finishing my bowl of Golden Grahams and made it to work just in time to open up the shop!


Eyes- Lids: Girly Girl Palette by Ulta
Eyeliner: Smokey Eyes Automatic Eyeliner in Espresso by Ulta
For application technique read my previous post.

Lips: e.l.f Super Glossy Lip Shine in Pink Kiss.

Cheeks: e.l.f. mineral blush in Joy.

I really like this look because it makes me feel very fresh and ready to start the day. I hope you all enjoy it.

Questions, comments, concerns, ideas? Please feel free to post them.

Love, Anna


Friday, June 11, 2010

Fast Face #2

In the short time that I have been working at the Persian rug store I've already learned so much. First and foremost, it is an art form. A real, quality piece is hand woven and can take years to compete. Only the finest wool and silk are used. If made correctly, these pieces can last hundreds and hundreds of years. Not only have I learned a lot about rugs, but also about the Persian culture (now I can make tea the "right" way). Why am I rambling about rugs? Well, I think that my love of the art of makeup has made me more open to other types of art: sculpture, oil, singing, modern, classical, whatever. No matter how ugly or aesthetically pleasing it is I have learned to find beauty or at least appreciate it for what it is. So my words of advice are take some time to culture yourself because it will give you the ability to connect with many different types of people on a deeper level.


For the eyes I used E.L.F eye shadow duo in Butter Pecan. I took the orange-brown and applied it to the lid. Next I took the chocolate brown shade and applied it as per usual in a "C-shape" starting in the crease. Then took the cream color from my Good Girl palette by Ulta and used it to highlight the brow. Line your eyes with any shade of brown that you own, and then gently sweep the eyes with mascara.

For the cheeks I took my all-color stick in Pink Lemonade by E.L.F and applied it to the cheek bones. For the lips I used the same color as I did for my cheeks! It's such a great product! Then to finish it off, I applied an orange gloss over my lips.

Have a lovely day!

Anna

Tuesday, June 8, 2010

Flower Eyes

This has to be probably one of my most favorite looks. The most recent time someone told me that my eyes looked like flowers! I think it's great because not only does the purple match well with my skin and make my eyes POP but it also affords me an opportunity to wear yellow in a way that is flattering. If you consider your eyes to be your best feature this can be a great way to direct attention towards them.


First I covered the lid in the bright golden yellow from the L'Oreal HIP bright shadow duo in Flamboyant. Then using my fluffy brush I applied the purple to the crease in a "C-shape" like I showed you in my eye shadow application tutorial. Then to add a little more depth I went over the "C- shape" again using Flash by Urban Decay, which is a shimmery, vibrant jewel-tone purple. Then to darken the corners I applied Last Call by Urban Decay which they describe as "plum punch"! Finally, I highlighted the brow using Iceland by Ulta.
For the eye liner I decided to kick things up a notch and use L'Oreal HIP color chrome eyeliner in Violet Volt. For the lips I decided to stay neutral with Vegas, Baby by Max Factor. I must say that I am absolutely in love with this shade! Just a light sweep of blush to the cheeks and mascara to the eyes and voila, my favourite face!

Tip: If you find this look a little too intense for you, tone it down easily. First, dip your brush in a little water and then apply the shadow with the damp brush it will make it much more subtle (this is called a "color wash"). Second, use brown eyeliner instead of the vibrant purple.

Enjoy, my little blossoming flowers!
Anna

Sunday, June 6, 2010

Fast Face #1

More often than not getting up and out the door seems impossible, let alone looking presentable. This morning I was running horribly late but with the precious minutes I had, I managed to come up with this look which took me only five, yes five minutes! No more excuses for schlepping out the door!

Using the Good Girl palette by Ulta I applied the lightest "bone" color just under the brow. Next I used the second lightest color a "sand" brown and swept it all over the lid up to the crease. Then I took a medium shimmer brown and worked it into the crease in a "C-shape" as per my previous directions. Finally I took the darkest brown (sort of a "milk chocolate" brown) and went over the outer corners of the "C-shape" to add a little depth. Finally I quickly lined the eyes with the Prestige eye liner in E12, which is a dark brown. Don't forget a quick sweep of mascara!


Now for the easy part. I took E.L.F.'s all over color stick in Pink Lemonade and just dabbed it on my cheek bones using the center of the eye as a starting point and blending all the way up to the temples. For the lips I used Cover Girl Outlast Lipstain in Everbloom Kiss. I particularly love lip stains because they are very natural looking and long lasting. If you don't have a lip stain I suggest putting on whichever shade of red lipstick you prefer. Let it sit for a few minutes and then gently wipe your lips. The color will absorb into your lips and leave them with a "just bitten" color!
Enjoy this spectacular day!
Anna

Friday, June 4, 2010

You are Beautiful!

Unfortunately, my camera has mysteriously disappeared so I cannot post any pictures until the little gremlin that stole it decides to return it. So I thought I'd discuss something very important: body image issues. It's something that most of us have to deal with each and every day. I know I've had days where I don't even want to look at myself in the mirror because I hate the reflection that stares back. Regardless of my personal body issues, I think it's very important to help other girls who are also having a hard time loving themselves. Here are some things I do to help myself feel a little better.


1. Don't focus on the negatives. Find at least five things that you like about yourself. Look into a full length mirror and pick out specific things that you find beautiful Tell yourself "I think I look really cute in the summer when my nose is speckled with freckles" or " I love how my brown eyes are so dark and mysterious". Don't be your harshest critic because you really are more beautiful than you give yourself credit for.


2. Your differences are what make you beautiful. You may hate the gap in your tooth, your "big" nose, or the birthmark on your hand; but I guarantee that others probably don't even notice it. Once someone told me that I "needed a nose job". Did it hurt? Yes. Did I care? No. People that can't find the beauty in you are not very beautiful inside and are not worth your time. Learn to accept the things that are different about you because they are what make you unique. Wouldn't it be horrible if we all looked alike?


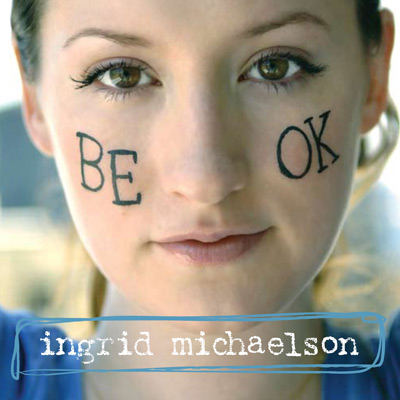
3. Tell yourself that you're okay. Thanks to Ingrid Michaelson, this has become one of my mantras. Some days it's especially difficult to convince yourself that you are in all actuality a wonderful person. This is when I look directly into my eyes and say "You're okay, Anna. Everything will work out, you will be okay." Say it over and over and you will be able to face the world with a little more confidence.


4. Put some extra effort into your appearance. When I feel my worst I always try to look my best. Pull out that cute sun dress and heels! Give yourself some smoky eyes or pouty lips! You'll get a boost of confidence and maybe some compliments too.
5. Make sure your clothes fit properly. Maybe your "back fat" is really just the result of an ill-fitting bra. Maybe the muffin top is only there because your pants are a couple of sizes too small. I think it's better to look fantastic in a size 12 than to tell your friends that you can squeeze into an 8! Purge your wardrobe and get rid of the things you haven't worn in at least a year. If you don't have the money for a new wardrobe just buy a couple of pieces that look great and mix and match them or even hunt down great deals at your nearest thrift store. Looking fabulous doesn't have to cost a lot and I think the confidence you will get is priceless!

Love of self is not something that we are all born with. It is a life-long struggle. Some days you will feel like the goddess you are, while others you will feel like a harpy. Just remember you are a beautiful woman that deserves to be treated with dignity and respect who is capable of both being loved and loving herself.

You are beautiful the way you are!

Love,
Anna